Art Lessons
|
|
Supply
list
|
|
| 1 |
Paper:
I prefer
300 lb paper but 140 lb, cold press paper is fine. Choose the
size and brand you like. It is easy to use the watercolor blocks
and the 12 x 16 is a nice size.
|
| 2 |
Brushes:
Try to have
a few round, large brushes (20 and 18 size) plus a few smaller
(10 or 8) rounds and a good rigger.
|
| 3 |
Miscellaneous:
Two bowls
for water (I keep one for clean water), a board to attach your
paper to (if you do not have a block), something to prop your
board on (I use a small 6 in. 2x4), a towel, paper towels, toilet
paper, salt, drawing pencils, kneaded eraser. |
|
| 4 |
Watercolor pigments:
Palette is
Primary and Value based
1 primary triad
of opaques- Opera, Manganese, Naples
Make all secondaries- more
options w/primaries
Two secondaries in
the palette- Cad. orange, Thalo green
Holbien makes
great colors and Daniel Smith makes good quinacridone colors
Reds:
Opera- cool, mid value, opaque
Quinacridone rose- cool, mid value, transparent, staining
Perm. Alizarin Crimson- cool, dark value, makes a great black,
transparent, staining
Cadmium red light-
warm, mid value, use only as mixer
Blues:
Cobalt- cool,
mid value, semi transparent/semi sedimentary
Ultramarine- cool, mid value, not a black mixture
Peacock- warm,
mid value, transparent, staining
Manganese or Cerulean- warm, mid value, opaque
Prussian- warm, dark value, makes a great black
Yellows/Oranges/Earth
tones:
Naples- opaque
Cadmium yellow lemon- sedimentary
Yellow ochre- sedimentary, earth tone
Cadmium orange- sedimentary, secondary
Quinacridone gold- all quins are transparent, staining, dye base,
intense
Quinacridone burnt orange- Black plus, wonderful mixer
Burnt sienna- earth tone, sedimentary
Greens:
Make your own
Winsor and Thalo greens make good blacks, secondary
|
|
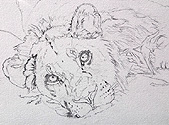
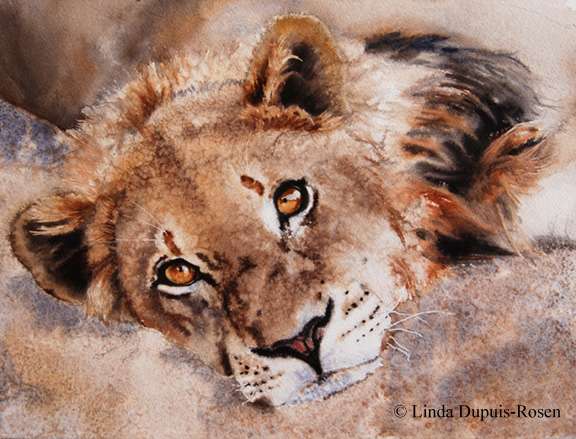
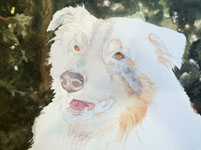
Subject: wildlife or pets
- Find a simple picture, (your
own).
- Turn it upside down, now draw what you see.
- You can let the right side of your brain do the work. It is
more about what you see than what you know. As you draw, keep
your pencil marks light and try to move quickly. Now, you need
to start checking proportions, is the right eye under the end
of the nose, where is the right ear in relationship with the
right eye and side of mouth, etc… Look, draw, check to another
area, fix, draw, check and so on. Once I feel it is starting
to look right I will darken my lines.
- Once you feel it is starting to look like your picture then
turn it right side up.
|
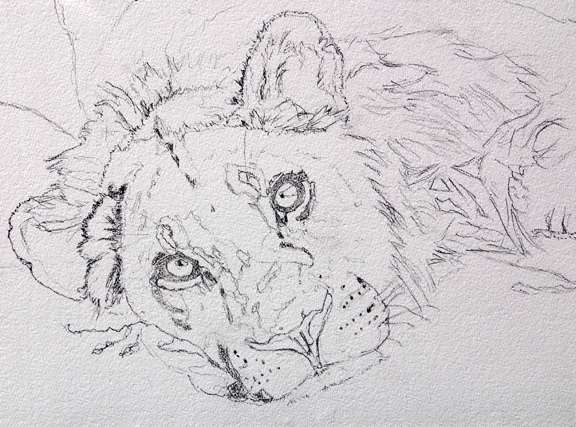 |
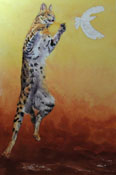
| - I will darken my lines just
in the important areas. No need to put too much detail in because
you will just paint over it. |
- When painting in watercolor,
you want to paint from light to dark. If you have whites in your
picture then do not paint over them.
Save Your Whites! . |
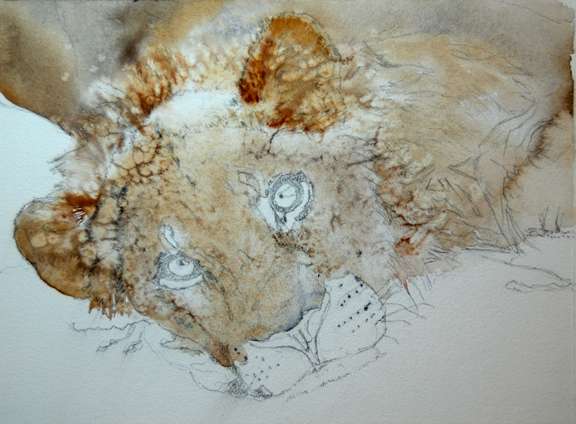 |
| - Next I did a light wash of
a mixture of yellow ochre, ultramarine, and quin. burnt orange
and added a small amount of salt just to the face area and then
I left it alone and let it dry. |
| - Use some masking fluid to
mask off the whiskers. You should not use a blow dryer to speed
up the drying process as it may make it difficult to remove the
masking fluid later. Next, I wet the eyes except for the highlights
and then dropped in quin. gold and a little quin. burnt orange
just around the outer edges and let the water do the work. Try
not to play with it, walk away and then come back in 30 minutes
and see what has happened. About 2 hours later I repeated the
process to intensify the colors, let it dry then I put a tiny
bit of ultramarine in a part of the highlight so that it was
not pure white. |
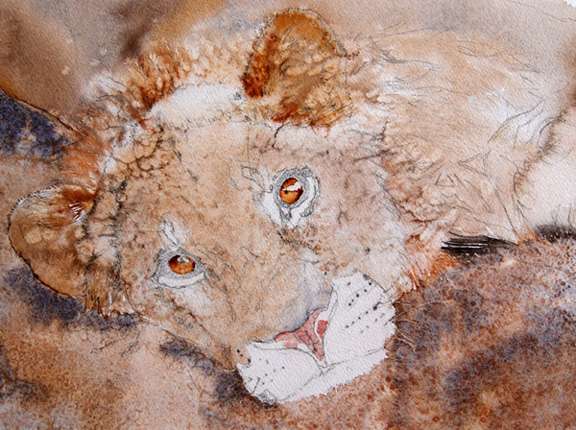 |
| - I wet the paper in the areas
I wanted to paint and put in french ultramarine mixed with burnt
sienna for the sand foreground. I waited for the shine to disappear
then added some salt, then let it dry. |
- Now that I have an underpainting,
I can start to build on the colors I have established. Next,
I wet the area and I did another light wash of a mixture of yellow
ochre, ultramarine, and quin. burnt orange over the cat and added
a small amount of salt just to the face area and then I left
it alone and let it dry. I did add my darks to the chest area
at this time with a rigger brush while it was still damp to get
the effect of the longer fur.
- With practice, you can learn to soften your edges by going
along the edges with a DAMP rigger brush where you have just
painted. Use a scrap piece of watercolor paper and practice this
so that you can get a feel for how damp to have your brush in
order to have a soft edge where you want it for the next part. |
 |
| - The last part is adding the
dark areas to the face and ears, using a mixture of prussian
blue, perm. alizarin crimson and quin. burnt orange. If you want
a warmer black, use a little more crimson and if you want a cooler
black, use a little more prussian in your mixture. I may add
4 or 5 hits of paint to get the intensity I want and each time
I use less water with my paint. When you feel that it is done,
the paper is completely dry, remove the masking fluid. You may
wish to soften the white of the whiskers if they stand out too
much then you are done! If you are a beginner in painting, you
often will find parts of the painting you like and some parts
that you don’t like. I feel that each painting in watercolor
is a lesson no matter how experienced you are is due to the nature
of the medium. I love the unpredictability of it! |
Click on an image below to
go to more Art Lessons
Scruffy |
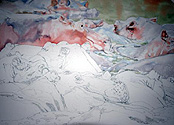
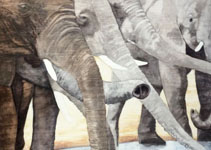
Hippos |
Serval Jumping |
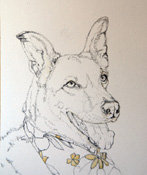
Dog Art Demo |
|
Work in progress |
|